Showing posts with label recipes. Show all posts

Spaghetti bolognese - tvp version (vegan)

09 January 2015

Towards the end of last year, we had visitors, including a 6-year old. One night, I made a lentil walnut loaf (this one), which the adults enjoyed, but I'm pretty sure she only ate it because her mum gave her a stern talking to about eating what other people prepare. The next night, I thought it would be nice to make something kid-friendly, no lentils in sight, preferably as indistinguishable from the real thing as I could make it.

Vegan spaghetti bolognese

It paid off. The "not hungry" little girl had one small serving, then a second. This was followed up by a third helping, minus pasta, during which she learned that there was no meat in the sauce, after which she followed up with another 2 small sauce-only serves. Win! I've made it several times since - it turns out that Hunter also enjoys the kid-friendly recipes quite a lot.

Spaghetti bolognese (TVP)

Serves: 4-6

Ingredients
  • 2-4 tablespoons light olive oil (not virgin)
  • 1 medium brown onion, finely chopped
  • 1 medium carrot, grated (no need to peel)
  • 1 stick celery, trimmed, finely chopped
  • 2 garlic cloves, crushed and minced
  • 1 1/2 cup TVP crumbles
  • 1 1/3 cup hot water
  • 1 teaspoon liquid smoke
  • 2 tablespoons beef style stock powder (I use Massel brand)
  • 1/2 cup dry white wine
  • 140g tub tomato paste
  • 2 x 400g cans diced tomatoes
  • 1 teaspoon Italian herbs
  • small pinch chilli flakes
  • 1 bay leaf
  • 2 teaspoons brown sugar
  • 1/2 cup water
  • 500g thin spaghetti
  • Nutritional yeast to serve

Method
  1. Heat oil in a large saucepan over medium-high heat. Cook onion, carrot, celery and garlic, stirring, for 5 minutes or until softened. 
  2. Meanwhile, mix the stock powder and liquid smoke into the hot water
  3. Add the dry TVP and stock mixture to the pot and cook over low to medium heat until water is completely absorbed.
  4. Add wine and cook until evaporated
  5. Add the tomato paste, tinned tomatoes, Italian herbs, chilli flakes, sugar and water. Bring to the boil. Reduce heat to low and simmer, uncovered, for 15 to 20 minutes or until thick. Season with freshly ground black pepper.
  6. Meanwhile, cook the spaghetti according to packet directions. A little bit of olive oil in the cooking water helps to prevent the spaghetti sticking together. Drain.
  7. Serve bolognese sauce atop pasta, with extra freshly ground pepper, and nutritional yeast if desired.
Notes
  • Originally, I prepared the "mince" first, removed it, cooked the onion mixture, and then added the "mince" back, but this is easier and there doesn't seem to be any perceptible flavour difference.
  • Cut back on the oil at your own risk, as TVP, unlike mince, doesn't contain any fat at all, and needs some added fat to make it taste right. You can probably use less oil than me though.
  • TVP can be bought from Indian grocers, and no doubt other places as well. It's much cheaper than frozen vegan "mince", and also lasts more or less forever in your pantry.
  • The amount of chilli I add isn't enough to give it any bite whatsoever, but it still lifts the recipe.

Decadent chocolate mousse with macerated berries

06 January 2015

I've been slack on the blogging front lately. I've been playing with lots of recipes, but haven't been able to get anything to a level where I'm happy sharing it here. In the meantime, here's an overdue post, the dessert from our early Christmas dinner.


This dessert took a bit of assembly, but the result is rich, decadent, and visually impressive.

Decadent chocolate mousse with macerated berries

Serves: 5-6

Macerated Berries
I'm afraid I can't give too much precision here, because I was anything but precise, but the basic idea was:
  • 1 punnet raspberries
  • 1 punnet blueberries
  • 1 punnet blackberries
  • 1 punnet strawberries - quartered
  • White sugar to taste
  • Vanilla to taste
Mix all the berries in a bowl, sprinkle with maybe 2-3 tablespoons of sugar and 1-2 tablespoons of vanilla. Feel free to add other flavourings if you like, a splash of liqueur would go well. Stir gently, cover with clingwrap, and put in fridge, at least for 2 hours and preferably overnight, stirring every now and then if practical.

The berries will soften slightly, absorb the vanilla flavour, and create a deliciously sweet berry syrup.

Mousse
The mousse component was Miyoko Schinner's Ultimate Chocolate Mousse, which I can vouch for as being excellent. I used Green and Black's 70% dark chocolate (vegan and fairtrade), and the full 1 cup of coconut solids still resulted in a very dark and rich mousse - perfect for my tastes, but still a bit too strong for Hunter.

Refrigerate the mousse for about 15-30 minutes before assembly - if it's too runny, it will run down around the berries and cover them, but if it's too stiff you won't be able to get smooth layers.

Assembly
In a glass of choice (I used a tumbler, but a martini glass would work also), spoon a layer of mousse into the glass, add a layer of berries with some syrup, another layer of mousse, and another layer of berries.

I found it better to make fewer thicker layers, as if I tried to make my berry layers too thin, the mousse ended up largely hiding the berries. I also didn't refrigerate the mousse before starting, which I think was part of my problem, the last one I made had much more defined layers, but also a rough top, so feel free to play around with it and leave comments on what did and didn't work for you.


Roast pumpkin pasta sauce (vegan)

15 November 2014

I tend to eat a lot of pasta, I suspect most vegans do. It's quick and easy, but tomato based sauces can get repetitive, and creamy sauces just aren't an everyday thing. I usually have a chunk of pumpkin mouldering in the back of the fridge... pumpkin lasagne is good, why not pumpkin pasta sauce? The first time I made this, I raved about it for days afterwards, it really is that good, and simple enough to make for an everyday dinner.

Roast pumpkin pasta sauce

Roast pumpkin pasta sauce

Serves: 4-5

Ingredients
  • 1 onion, roughly chopped
  • 2 cloves garlic, roughly chopped
  • 3 cups mashed roast pumpkin
  • ½ cup nutritional yeast
  • 1 vegetable bullion cube
  • ¾ cup soy milk, or to desired consistency
  • freshly ground black pepper, to taste
  • I cup walnuts, Crumbled (for garnish)
  • 1 packet fettuccine

Method
  1. Get water boiling, and then prepare fettuccine according to packet directions.
  2. While waiting for the water to boil, in a medium saucepan, cook onion and garlic until translucent.
  3. Meanwhile, dry-toast walnuts in a frying pan or in the oven until fragrant (optional but worth it).
  4. Add pumpkin, bullion cube, soy milk and nutritional yeast, and some freshly ground black pepper. Heat through
  5. Use an immersion blender to puree. Alternatively, cool, and transfer to a blender.
  6. Serve atop fettuccine, garnished with walnuts, and some more freshly ground pepper

Roast pumpkin pasta sauce

Almond and cranberry muesli bars (vegan)

01 October 2014

I've eaten a lot of muesli bars in my life. Most commercial muesli bars are not vegan. The ones that are (I'm talking to you Be Natural) taste rather crap. My favourites as a kid were the Uncle Toby's yoghurt topped ones, something I haven't figured out how to reproduce yet, although I believe it could be done at home with the help of a dehydrator. So, yoghurt topped these are not, but delicious they are, and pretty healthy too. Chewy, hearty, and not too sweet.

Almond and cranberry muesli bars

I've been cycling a lot lately, a long ride every weekend on top of my usual commuting, and find that one of these makes a great mid-ride pick-me-up. They also make good study food. I eat too much study food...

Almond and cranberry muesli bars

Almond and cranberry muesli bars

Makes: about 18 bars, depending on how you cut them

Ingredients
  • 1½ cups rolled oats
  • ½ cup almonds, roughly chopped
  • ½ cup shredded coconut
  • ¼ cup agave or maple syrup (or honey, if you're ok with that)
  • ¾ cup smooth peanut butter (or other nut butter)
  • ⅔ cup sweetened dried cranberries (craisins)
  • ½ cup chocolate chips

Method
  1. Pre-heat oven to 180 and toast the oats in a brownie tin for about 15 minutes, or until lightly golden and crispy, then transfer to a large bowl.
  2. Now roast the almonds for about 10 minutes, or until fragrant, then transfer to the bowl.
  3. Turn off oven, then toast the coconut in the still warm oven for about 5 minutes, until golden. Watch closely, as coconut burns quickly.
  4. Meanwhile, mix the agave and peanut butter in a small saucepan over low heat until combined.
  5. Add all the remaining ingredients to the bowl, including the peanut butter mixture, and mix thoroughly.
  6. Once the brownie tin is cool enough, wipe it out, and line the bottom and sides with cling wrap. Fill with muesli bar mixture, and use the back of a spoon to distribute evenly, packing it down firmly to help it hold together.
  7. Cover with another layer of cling wrap,and transfer to the freezer for about 1 hour, or until solid.
  8. Remove all the cling wrap, transfer to a cutting board, and cut into bars, squares, or whatever you prefer. I cut mine in half lengthways, and then into small bars.
  9. Store in an airtight container in the fridge or freezer.

Almond and cranberry muesli bars

Teriyaki Sauce (vegan)

30 August 2014

The first time I made a home made a teriyaki noodle bowl, I kept making contented humming noises and saying things along the lines of "I've cracked noodle box." This sauce is good. Really good. The day I took these photos, I was home alone and made a half recipe over noodles and veggies, which should have been enough for dinner and lunch the next day. I had to find something else for lunch...


Teriyaki Sauce

Makes: Enough sauce for 3-4 servings of stir fry
Adapted from: Oh She Glows

Ingredients
  • 4 1/2 tablespoons mirin
  • 1/4 cup + 2 tablespoons soy sauce
  • 1 tablespoon sesame oil
  • 1 teaspoon rice wine vinegar
  • 3 teaspoons raw sugar, or to taste
  • 2 cloves garlic, minced
  • 1 1/2 teaspoons fresh ginger, minced (out of a tube/jar is fine)
  • pinch of chilli flakes
  • 1 tablespoon cornflour
  • 2 tablespoons cold water
  • sesame seeds for garnish

Method
  1. Mix together cornflour and water in a small dish until smooth, and keep separate.
  2. Whisk together all the other ingredients in a small-to-medium mixing bowl.
  3. Set aside, to let the flavours meld, and prepare your stir fry or noodle bowl ingredients.
  4. Once your stir fry is done, pour in the sauce and bring to the boil
  5. Re-mix your cornflour, and then add to the sauce and stir through for about 30 seconds or until sauce is thickened, then remove from heat.
  6. Serve, garnished with sesame seeds.

Traditional Lasagne - Veganized

17 August 2014

Growing up, Mum's lasagne was one of my favourite foods, and it easily beat any other traditional lasagne I'd ever eaten. I used to rave to my friends about how good Mum's lasagne was, especially when we got fed some terrible lasagne look-alike on school camp. In retrospect, I expect my friends found it rather tedious.

Vegan traditional lasagne


I don't usually cook with fake meats, but to make this vegan version taste authentic, I needed to try something other than lentils. Enter TVP, and I must say that I was pleasantly surprised at the result. In this dish, I suspect it could fool most omnivores, although it's not easy for me to test this theory.

This recipe is long and contains a lot of steps. It is time-consuming, but it isn't difficult. Give it a try, you won't be disappointed

Recipe Notes
  • Liquid smoke isn't the easiest ingredient to find in Australia. If you can't find it, it doesn't matter, I just added it to compensate for the smokiness of the missing bacon. You may be able to find it in a health food store, or, if you have one nearby, an import store.
  • It may seem like there's quite a bit of oil in the sugo. This is because meat naturally contains fat, but TVP doesn't have any, and needs fat added to give it a nice mouth-feel.
  • You shouldn't need to add any salt to the sugo because of the salt in the beef style stock. If you use a salt free stock powder, you might need to add salt. If you use a salty stock powder, and it's not salty enough, I'd recommend adding more stock powder instead of salt.
  • You can prepare this the morning of or even the day before. Just cover with clingwrap and store in the fridge. This makes it ideal for entertaining. I think that the fact that the lasagne noodles have time to absorb juices prior to going into the oven more or less compensates for the fact that the lasagne needs to be heated up from cold rather than warm.
  • You can use commercial vegan cheese on top instead of the cheesy sauce. In that case, just make half the amount of bechamel base, and then add the nutmeg to it.

Traditional Lasagna

Serves: 6-8
Veganised from Mum's lasagne recipe, which I think originally came off a lasagne box a long long time ago

Ingredients
TVP "Mince"
  • 3/4 cup TVP crumbles
  • 2/3 cup hot water
  • 1/2 teaspoon liquid smoke
  • 1 tablespoon beef style stock powder (I use Massel brand)
Sugo (the tomato layer)
  • 2 + 2 tablespoons light oil (not virgin), divided
  • 1 Small onion
  • 1 quantity "mince"
  • ¾ cup dry white wine
  • 2 x 400g tins peeled and diced tomatoes
  • ¼ cup tomato paste
  • 1 heaped teaspoon Italian herbs
  • 1 tablespoon sugar
  • Freshly ground black pepper
Bechamel/Cheesy topping
  • 4 tablespoons light olive oil (not virgin)
  • 4 tablespoons plain flour
  • 1.2L soymik 
  • 1 teaspoon salt
  • Freshly ground pepper
  • 1/2 teaspoon nutmeg
  • 1/3 cup Nutritional yeast
  • 1/2 teaspoon Lemon juice
Other
  • About 1 box instant lasagne sheets (6 large sheets)

Method
TVP "Mince"
  1. Mix the stock powder and liquid smoke into the water
  2. Add the dry TVP to a medium sized pot, cover with the stock mixture, and cook over low to medium heat until the water is completely absorbed
  3. Add half the oil, and try to brown it, or at least cook until all the oil is absorbed, and then a few minutes afterwards. I find it difficult to get to brown.
  4. Set aside.
Vegan traditional lasagne - TVP "mince"

Sugo
  1. In the same pot you used for the mince, heat the remaining oil, and cook the onion over medium heat until golden brown, then add back the mince.
  2. Increase to high heat, add wine and stir until it evaporates.
  3. Add the tinned tomatoes and tomato paste, and bring to the boil.
  4. Season with freshly ground black pepper, sugar and mixed herbs. Taste, and if it needs salt, add more beef stock powder, or if you prefer, salt.
  5. Cover, and set aside. 
Vegan traditional lasagne - Sugo

Bechamel
  1. Heat oil over medium heat, and whisk in flour.
  2. When the roux turns lightly golden, gradually pour in the soymilk, stirring constantly. It will go really lumpy at first, but as you keep adding milk and stirring it will smooth out.
  3. Season with salt and pepper and continue to stir until sauce has boiled and is smooth and thick.
  4. Vegan traditional lasagne - Bechamel sauce

  5. Divide in half
  6. Season one half with nutmeg. This forms the bechmel.
  7. Stir nutritional yeast and lemon juice into the other half. This forms the cheesy topping.
Vegan traditional lasagne - Cheesy topping

Assembling the Lasagne
  1. Lightly grease an oven-proof lasagne dish.
  2. Pour a thin layer of bechamel into the dish. 
  3. Vegan traditional lasagne - Assembly
  4. Arrange uncooked lasagna sheets over the bechamel. 
  5. Vegan traditional lasagne - Assembly
  6. Cover with half the sugo and half the remaining bechamel.
  7. Vegan traditional lasagne - Assembly
    Vegan traditional lasagne - Assembly
  8. Add another layer of lasagne sheets.
  9. Repeat step 4 and 5.
  10. Vegan traditional lasagne - Assembly
  11. Cover the top with the cheese sauce, making sure that there isn't any lasagne sheet left uncovered, or it won't have the moisture it needs to cook.
  12. Vegan traditional lasagne - Assembly
  13. Bake in oven at 180°C for 35-45 minutes or until the lasagne sheets are soft (you can try pricking it with a fork to test). 
  14. Take from oven, cover, and allow to set for 10-15 minutes. Don't be tempted to skip this, or you will end up with slop. Tasty slop, but not at all attractive looking.
  15. Vegan traditional lasagne
  16. Serve with garlic bread, or even better fresh hot bread (Coles/Woolworths bake-at-home dinner rolls are a deliciously easy option) and a fresh garden salad.

At this point, I need to rant about lasagne photography. If it's hot, it falls apart and forms a gloopy mess that is completely not photogenic. If it's cold, it holds together well, but somehow, it's visibly cold and unappetizing in the photo (see below). I think the trick is to cool it completely, then cut it, and then microwave it a little bit, so the top is warm but the insides are still cold, and then it holds together fairly well but doesn't have that unappetizing cold look to it. At that point, however, I'd rather given up. It was the third time I'd made this lasagne to develop the recipe (you can see that some of the photos were taken in different kitchens), and it was the second day of eating and photographing that particular lasagne, and I didn't want to reheat two extra serves of lasagne that weren't going to be eaten that day.

Vegan traditional lasagne

Seriously though, make this lasagne. It's seriously good comfort food.

Vegan butter

13 August 2014

Giving up butter was a major hurdle for me in going vegan. Let's face it, Nuttlex tastes rather like the solidified grease it is, and while I know of one other brand of vegan margarine in Australia, I'm not prepared to go to a health food store to buy my butter alternative, nor am I prepared to pay health food store prices. In fact, I've never even tried Melrose. So Nuttlex it was, and it did the job in some contexts, even while it failed miserable on hot fresh bread or on pancakes.


So when I came across a recipe for homemade vegan butter that claimed to taste just like the real thing, it caught my attention. It took me a while to track down all the ingredients, but it was definitely worth it. I've made it a number of times now, and while there's still some Nuttlex sitting in my fridge, it's been abandoned - I haven't had to replace it since I discovered this recipe. While I don't think it tastes exactly like dairy butter (it has a faint coconut aroma for a start, though that could be the oil that I'm using), it's an excellent alternative, not just a lacklustre replacement.


The only problem is that I always want to make a tipple batch (to fill my giant ice cube tray), and the original recipe is awkward to multiply out. This is further complicated by the fact that Australian cups and tablespoons are slightly different to US ones, something that I usually ignore, but in this case, I find it important to measure as accurately as possible. As such, I've reproduced Mattie's genius recipe below, with measurements converted to Australian units and tripled. I've also modified the steps slightly to incorporate some things I found helpful. However, I highly recommend you also read his spiel about how and why it all works. If you like this one, you might want to try some of his other vegan butter recipes. So far, I've also made the garlic butter, which was amazing, though not quite as versatile.

Vegan Butter

Makes: 6 x 100g (approx) blocks
Tripled and updated for Australians, with permission, from veganbaking.net

Notes
  • Making smooth Vegan Butter is dependent on the mixture solidifying as quickly as possible after it's mixed. So when melting your coconut oil, be careful to just barely melt it. I find that a few floating lumps are dealt with just fine by my blender. If you're doing this on a hot day, you may actually need to cool your oil in the fridge before you start.
  • Mattie recommends using this ice cube tray, and I also find that it does the job very nicely. However, any small container will do the trick.
  • I know weird, hard to pronounce ingredients like lecithin and xanthan gum are scary to a lot of people. However, I know where they come from, what purpose they're serving, and I consume them only in moderation - probably a lot less than the average person since I rarely consume packaged foods. Don't tell me about health risks, I'm not interested. If you're concerned, just don't make this recipe.
  • I wanted to avoid using multiple teaspoon increments on all these measurements, but unfortunately, without using non-standard kitchen measuring tools, it's not possible to be accurate enough going by weight for such small quantities, and I don't have anything to measure small quantities of liquid by volume. Sorry.
  • Some advice on chasing down ingredients:
    • Lecithin granules can be found in the health food section of Coles or Woolworths. I believe that liquid lecithin would give a better result and I intend to track some down, but the granules are fine for a first try.
    • Coconut vinegar can be hard to find. My local Asian Grocer didn't stock it, but I found it at the Asian Grocer at the Prahran Market, and it was dirt cheap. If you're not in Melbourne, you're on your own as far as finding it goes, but if you can't find it, just use all apple cider vinegar.
    • I found xanthan gum in a health food store. You may also be able to find it in Coles or Woolworths in the health food aisle. It's a common additive for gluten free baking.
    • I haven't yet found a good bulk source of refined coconut oil. Currently, I'm using this coconut oil, but as it's purified and deodorised rather than refined, it leaves a faint though not unpleasant coconut flavour. If you know of another source, please let me know in the comments.

Ingredients
  • 200mL soy milk
  • 1 ½ teaspoons apple cider vinegar 
  • 1 ½ teaspoons coconut vinegar
  • 1 + ⅛ teaspoons salt
  • 390g refined coconut oil
  • 2 tablespoons + 1 teaspoon canola oil, light olive oil or rice bran oil
  • 3 teaspoons liquid soy lecithin or liquid sunflower lecithin OR 1 tablespoon + 2 ¾ teaspoons soy lecithin granules
  • ¾ teaspoon xanthan gum or 1 ⅞ teaspoons psyllium husk powder

Method
  1. Measure out soy milk in a small measuring jug, and add vinegar(s) and salt. If using lecithin granules, add now to give them time to soften. Whisk together with a fork, and let stand for about 10 minutes, until it curdles and thickens.
  2. Meanwhile, melt the coconut oil in the microwave so it's barely melted.
  3. Add the coconut oil, soy milk mixture, canola oil, lecithin (if not already added), and xanthan gum to a food processor or blender.
  4. Blend/process for about 2 minutes, scraping down the sides halfway through if necessary. If using lecithin granules, you may need to process for slightly longer.
  5. Pour the mixture into a mould and immediately place it in the freezer to solidify. Depending on how cold your freezer is set, it should be ready in 1-3 hours.
  6. Store it in an airtight container in the fridge for up to 1 month or wrapped in plastic wrap or in an airtight container in the freezer for up to 1 year.


Coconut butter

30 July 2014

Apologies for the absence. We've finally moved, and the past week has been a hectic blur of packing, cleaning, moving, cleaning, unpacking, waiting on deliveries/connections, and starting uni. It's now just barely under control (we still don't have an Internet connection), so here's a post that I prepared earlier. I meant to take a few more photos, but I'm sure what I've got will do.

Coconut butter is like peanut butter, but made with coconut. It's expensive to buy, but cheap and easy to make, and very tasty.

Coconut butter

Most online guides I've read indicate that ordinary blenders (i.e. not in the Vitamix/Blendtech range) can't successfully make coconut butter. I tried it in my KitchenAid (a mid range blender) anyway, and it worked. However, if your blender is a cheapie, you might need to use a food processor.

Coconut butter

Ingredients
  • Shredded coconut
Seriously, that's it. I haven't tried, but apparently flaked coconut works better, while desiccated has too much moisture removed so it doesn't work. I make a 500g bag's worth at a time

Method
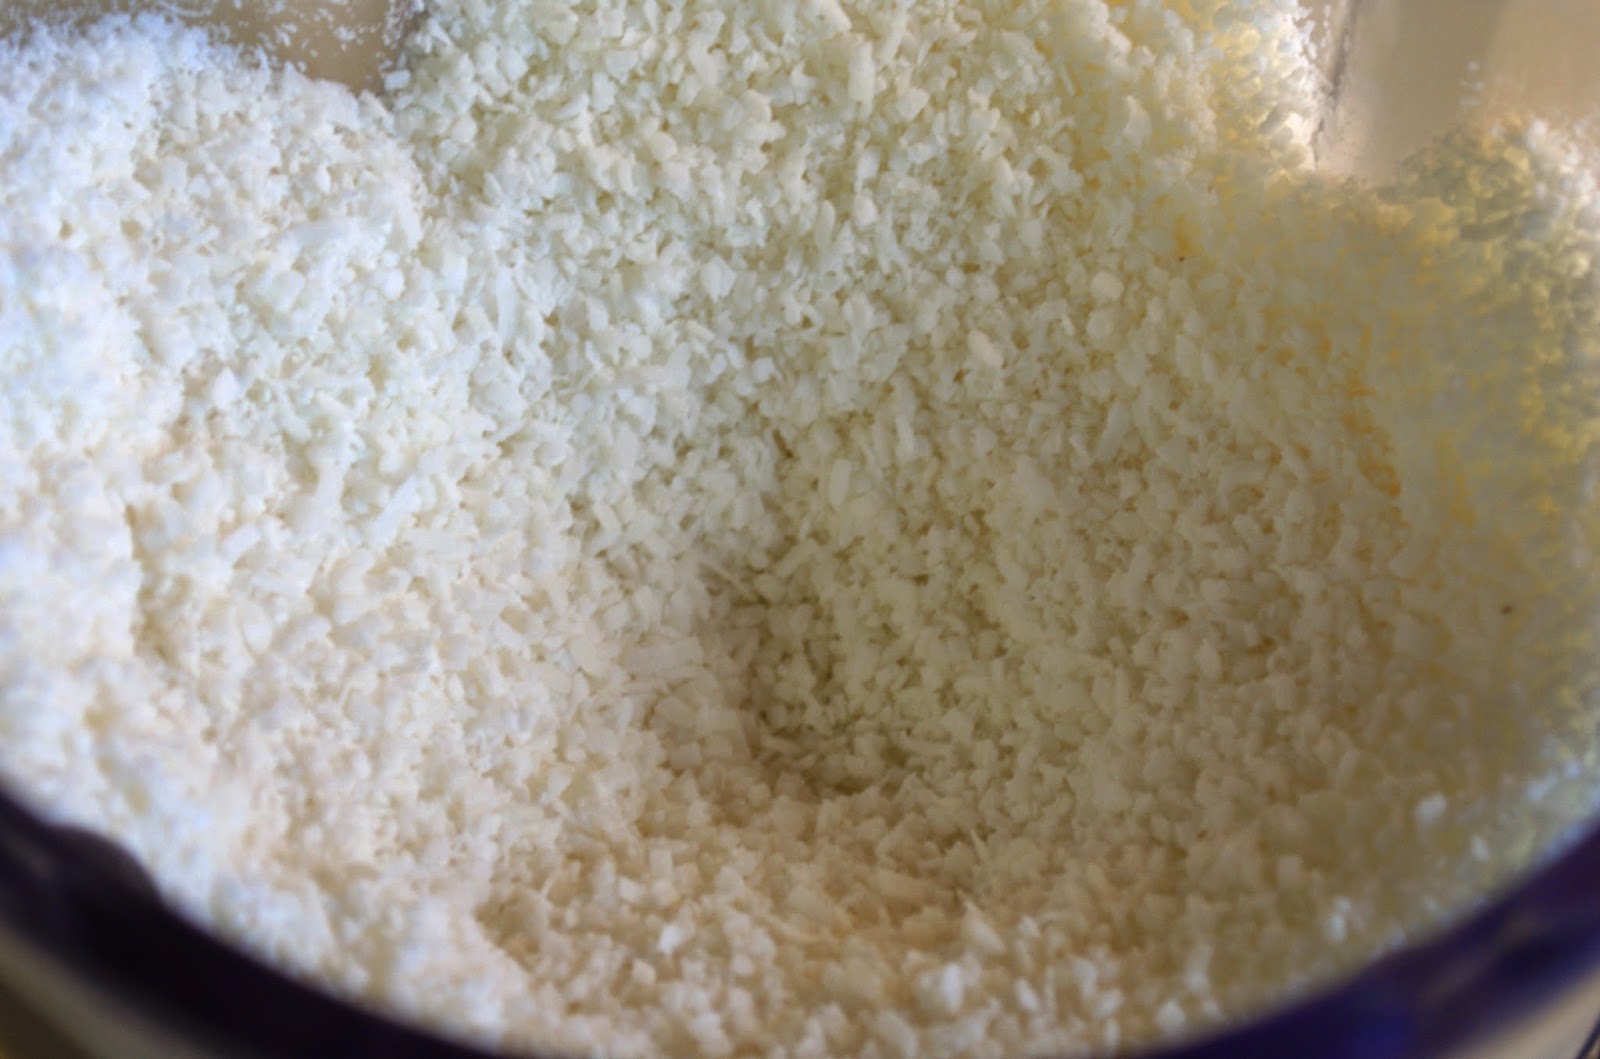
  1. Tip the coconut into a food processor or blender. If it doesn't all fit, add as much as will fit, pulse a few times to compress what's there, then add the rest. Keep blending until it's smooth. I've got some photos of the stages here. If your blender/food processor is getting hot, you may need to give it a break for 30 minutes or more, just don't leave it so long that the butter starts to solidify, especially in winter, or you'll probably kill your machine. 


Making coconut butter - the coconut
Unprocessed shredded coconut

Making coconut butter - finely chopped coconut
Finely chopped coconut

Making coconut butter - starting to clump
The oil is starting to release. As it progresses here, it may get to the point where the coconut just builds up on the sides and stops falling into the middle. You can turn the blender off, and push the coconut into the middle, or, if you're impatient, you can carefully, use the back end of a wooden spoon to gently nudge the coconut clumps towards the middle, making sure to keep the spoon well clear of the spinning blades. I find that it takes way too much time if I keep turning it off, but if you ruin your blender, I take zero responsibility.

Making coconut butter - starting to liquefy
After a bit more time, it will go liquid enough that it no longer needs assistance, but is still very grainy. You can start gradually upping the speed towards maximum speed now.

Making coconut butter - looking smooth
Then it will start to look smooth. However, you still need to keep blending for a good bit of time after it starts to looks smooth before it actually approaches smooth. Every now and then, stop it and dip a spoon in to taste test the texture. When you're happy with the texture, stop. Mine won't go perfectly smooth, but I guess that's because I'm only using an ordinary blender.


If your blender is struggling to get it to go liquid, apparently adding a bit of melted coconut oil can help, though I can't vouch for it as I've never needed to.


Usage suggestions
  • Eat with a spoon
  • Spread on toast, I like it on toast with jam
  • Eat it with a spoon, did I already say that?
  • Add to smoothies
  • Use as icing for quickbreads or muffins 
  • Do not use as a butter substitute for cooking, remember, it's butter like peanut butter, not like dairy butter. 

Storage
Transfer to an airtight container and store in the pantry. I find these jars from Ikea to be cheap and the perfect size. In winter it will go hard, in summer it may go completely runny. If it's too hard to use, you can sit it in warm water for a bit. It will separate, so try to stir it back together before you use it. It should keep for at least a year.
 

Simple tomato-free dahl

19 July 2014

This dahl is versatile and can be easily adapted to the vegetables you have on hand. I don't believe it's very traditional, but what does that matter? It also happens to be tomato free, which is handy if you're feeding a nightshade avoiding mother in law. Don't have one of those? Make this anyway, it's mild but flavoursome, and tastes much better than it looks.


Simple tomato-free dahl

Serves: 4-6
Adapted from: Best Recipes

Ingredients
  • 1 large onion, finely chopped
  • 3 cloves garlic, crushed
  • 1.5 teaspoon ginger, minced
  • 1 bay leaf 
  • 1 tablespoon oil
  • 1 cup red lentils (I used whole, but for a more traditional dahl texture, use split)
  • 2 teaspoons curry powder
  • 1 teaspoon turmeric
  • 3 cups vegetable stock, approximately 
  • about 1 cup diced sweet potato (about 1/2 a sweet potato)
  • about 1 cup diced pumpkin
  • 3-4 chopped button mushrooms
  • ½ red capsicum, chopped into strips
  • 400mL can coconut milk or cream
  • 2 cups chopped spinach or baby spinach leaves

Method
  1. In a large saucepan, heat the oil over medium heat, and add onion, ginger, garlic and the bay leaf, and fry until the onions are soft.
  2. Add the lentils, curry powder and turmeric and try for a couple of minutes, stirring continuously, until aromatic.
  3. Add the mushrooms, sweet potato, pumpkin and capsicum and saute for a few minutes.
  4. Add the stock and coconut milk.
  5. Bring to a simmer, then reduce heat and cook, uncovered, for 30-45 minutes, stirring occasionally. Add more water if required.
  6. When vegetables and lentils are cooked through and soft, add the spinach and stir through to wilt.
  7. Serve with brown rice, or whatever carb takes your fancy.

Vanilla berry porridge (vegan)

17 July 2014

To my mind, this porridge is nowhere near as good as my chocolate porridge, but I've been lead to believe that there are some people in the world, among them my brother and my husband, who actually prefer vanilla over chocolate. While I firmly believe this to be a very weird preference, they are family, so I must respect their preferences.

Until such a time as I can persuade them of the superiority of chocolate, here's a vanilla breakfast alternative.

Vanilla porridge with strawberries

Vanilla berry porridge

Serves: 1

Ingredients

  • 1 large overripe banana, or 1.5 small ones
  • Generous pinch shredded coconut (about 1 tablespoon)
  • Scant 1/3 cup rolled oats (you may want more if you have a large appetite in the morning)
  • 1 to 1 1/3 cups soymilk, or to desired consistency, I like mine pretty loose
  • 2 teaspoons vanilla 
  • a few grains of salt
  • Small handful of berries to top

Method
  1. Mash the banana
  2. Mashed banana
  3. Mix in coconut and oats
  4. Mashed banana with oats and coconut
  5. Mix in soymilk.
  6. Vanilla porridge, pre-cooking
  7. Cover with a plate, and microwave for 1 minute, then wander off and do something, turn on the computer, check blog feeds, get dressed or whatever, for about 3-5 minutes.
  8. Mix thoroughly, then return to microwave, and repeat step 4.
  9. Stir in vanilla
  10. Top with strawberries

Pumpkin risotto (vegan)

13 July 2014

I never ate risotto as a child. Dad doesn't approve of mushy rice, and risotto falls into that category for him, so we just never ate it. While mushy rice with stir fry is rather gross, risotto is delicious. Sorry Dad, you're wrong on this one.


Pumpkin Risotto

Serves: 4-6
Veganized and otherwise improved from: Charlie Palmer

Notes
  • Because you use so much stock and it gets cooked down, if you don't use salt-reduced stock, it might end up crazy salty, especially if, like me, you always make a stronger than recommended stock. I haven't had problems with Massel stock (not salt reduced), but last time I used Vegeta and it was over-salty. You have been warned.
  • I've erred on the conservative side with the nutritional yeast. I suggest adding the 1/4 cup, and then adding extra to individual plates if desired.

Ingredients
  • 2 + 2 tablespoons olive oil (light, not virgin), divided
  • 2 medium onions, the first can be coarsely chopped, the second should be finely diced
  • 2 cloves garlic, minced
  • 600g pumpkin, peeled and diced
  • 3/4 cup dry white wine (or water)
  • 1 ½ teaspoons nutmeg
  • About 1 teaspoon white pepper
  • 7 cups salt-reduced vegetable stock
  • 2 ½ tablespoons vegan butter (optional)
  • 1 ½ cups arborio rice
  • ½ cup nutritional yeast

Method
  1. Heat 2 tablespoons of oil in a large saucepan (I usually use a wok, it's unconventional, but it works well). Add the coarsely chopped onions and the garlic,and cook over a moderate heat until the onions are translucent.
  2. Add the pumpkin, and cook, stirring frequently, until the pumpkin is just tender, about 7 minutes. 
  3. Stir in the wine, nutmeg, and white pepper and cook, stirring occasionally, until most of the liquid has evaporated, about 12 minutes. Remove from heat and allow to cool slightly.
  4. In a medium saucepan, cover the stock and bring to the boil, then reduce heat so it's just simmering. 
  5. Purée the pumpkin mixture. I usually a stick mixer, but you can use a food processor or blender. I like to leave it with a bit of texture, but if you prefer smooth, do that. Set aside within easy reach. 
  6. Wipe out the pan/wok you used for the pumpkin, and add the remaining oil. When it's hot, add the rice and the remaining onions and cook over moderately high heat, stirring with a wooden spoon, until the onions are translucent, about 7 minutes.
  7. Add a ladle-full of the hot stock and cook, stirring constantly, until all of the liquid has been absorbed. Sorry, no photos from here on, because of the need for constant stirring.
  8. Add about 2/3 of the remaining stock, a ladle-full at a time, stirring constantly, and waiting until the stock is almost completely absorbed before adding the next. The pan should be hot enough that the stock continues to simmer when it hits the pan, but isn't rapidly boiling. This should take about 20 minutes. 
  9. Stir in the pumpkin mixture, and stir for a few minutes until it thickens. 
  10. Continue adding the remaining stock, again a ladle-full at a time, again waiting until most of the liquid is absorbed, though it will be looser now. This should take approximately 5 minutes longer.
  11. Stir in the vegan butter and nutritional yeast. Serve immediately.

Avocado "cheese" wrap (vegan)

11 July 2014

I just stumbled upon this combination one day when I threw together whatever I could find for lunch. The combination tastes way better than the simple ingredients would imply. The mixture of avocado and nutritional yeast wouldn't fool anyone into thinking it was cheese, and yet it makes a surprisingly satisfying cheese alternative.


Enjoy as a snack or a light lunch.

Avocado "cheese" wrap

Ingredients
  • 1 tortilla
  • 1/2 a large avocado, or 1 small avocado (soft)
  • freshly ground sea salt (to taste)
  • 1-2 tablespoons nutritional yeast
Method
  • Spread the tortilla with a generous layer of avocado, add salt if desired, and sprinkle with nutritional yeast
  • Stick under a low grill for a few minutes, until it turns golden brown, but before the edges of the tortilla turn black!
  • Roll up and eat!